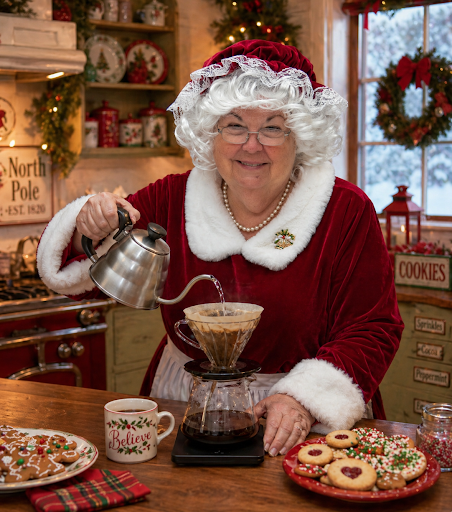
The Jolly Old Elf’s Guide to Perfect Pour-Over Coffee
By Mrs. Claus
While Santa is often dashing about with his bold brews and quick cups, I prefer something a bit more… graceful. Pour-over coffee is my quiet morning ritual—simple, elegant, and made with care. It’s the kind of brewing that invites you to slow down, even in the busiest season.
So tie on your apron, dear, and let me show you how to make a cup that’s as comforting as a wool blanket fresh from the fire.
Step 1: Gather Your Tools
You’ll need:
- A pour-over dripper (ceramic or glass works beautifully)
- A paper filter
- Fresh coffee beans
- A grinder
- A kettle (a gooseneck, if you have one—it makes pouring ever so much easier)
- A mug or carafe
A tidy workspace makes for a tidy mind—and a better cup.
Step 2: Grind with Care
Use freshly ground coffee, medium grind—like coarse sand.
Too fine, and the water will struggle to pass through. Too coarse, and it will rush through without gathering all those lovely flavors. We’re looking for balance, just like a well-kept kitchen.
Step 3: Heat the Water
Bring your water to a boil, then let it rest for about 30 seconds. The ideal temperature is around 195–205°F (90–96°C).
Water that’s too hot can be harsh; too cool, and the flavor won’t fully bloom.
Step 4: Prepare the Filter
Place your paper filter in the dripper and rinse it with hot water.
This removes any papery taste and warms your dripper and cup—such a small step, but it makes all the difference.
Step 5: The Bloom
Add your coffee grounds (about 1–2 tablespoons per cup) to the filter.
Pour just enough water to wet the grounds—about twice the weight of the coffee—and let it sit for 30–45 seconds.
You’ll see the coffee puff up and bubble gently. That’s the bloom, and it’s where the magic begins.
Step 6: Pour Slowly and Steadily
Now continue pouring in a slow, circular motion, starting from the center and moving outward, then back again.
Take your time—this isn’t a race. Pour in stages, allowing the water to drain slightly between pours.
The total brew time should be around 2½ to 3½ minutes.
Step 7: Serve with Love
Once the water has passed through, remove the dripper and give your coffee a gentle swirl.
Take a moment to enjoy the aroma before that first sip—it’s part of the experience.
Mrs. Claus’s Final Tips
- Use filtered water for the cleanest taste.
- Keep your pours gentle and controlled—too fast can upset the balance.
- Don’t be afraid to adjust your grind or timing until it’s just right for you.
Pour-over coffee is more than a method—it’s a moment. A pause in the day to create something warm, thoughtful, and made just the way you like it.
Now then, I think Santa’s just come in from the cold… and I believe I’ll make him a cup too.
With love, and happy brewing,
Mrs. Claus